Route 53 Health Status Alarms
Overview
This guide describes how to configure email alerts when a URL monitored by Route 53 health checks becomes inaccessible. It also provides information on how to enhance the alerts with availability portals and outage details using Axibase Time Series Database (ATSD) Rule Engine.
Initial Configuration
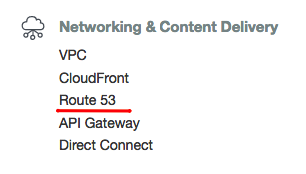
From the AWS Console Home page, navigate to Route 53 by opening the Services drop-down list in the upper toolbar and clicking Route 53 under the Networking and Content Delivery section.
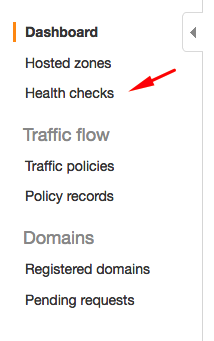
Select Health Checks from the toolbar on the left and click Create Health Check. If you have not set up Route 53 services with your AWS account, bypass the introductory screen by clicking Get started now under Availability Monitoring.
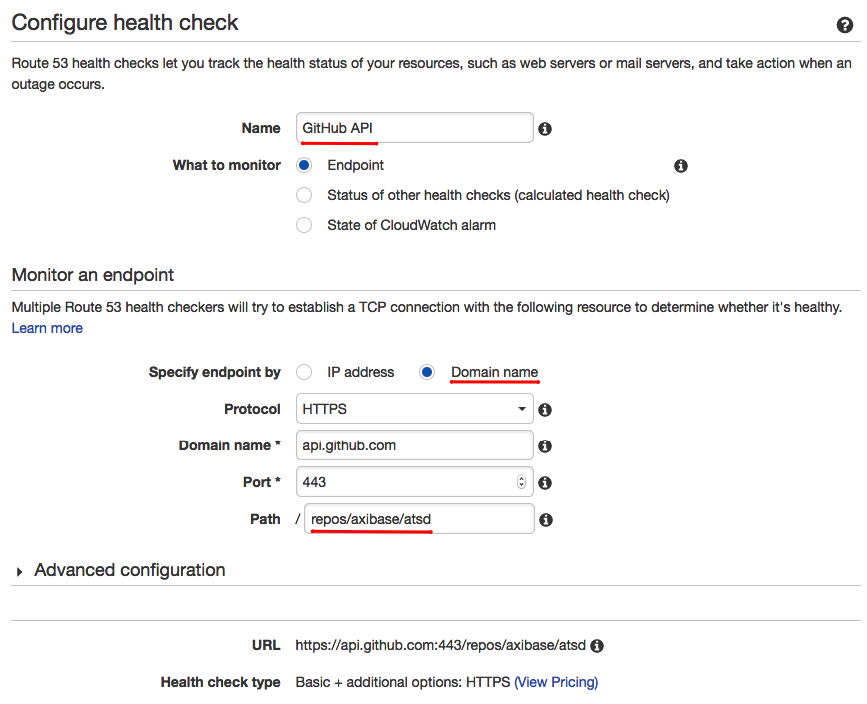
Configure a new endpoint health check on the form shown below. Specify the Domain Name to monitor the status of a specific website and define the path you would like to monitor. Click Next.
On the following page, configure an alarm based on the newly created health check.
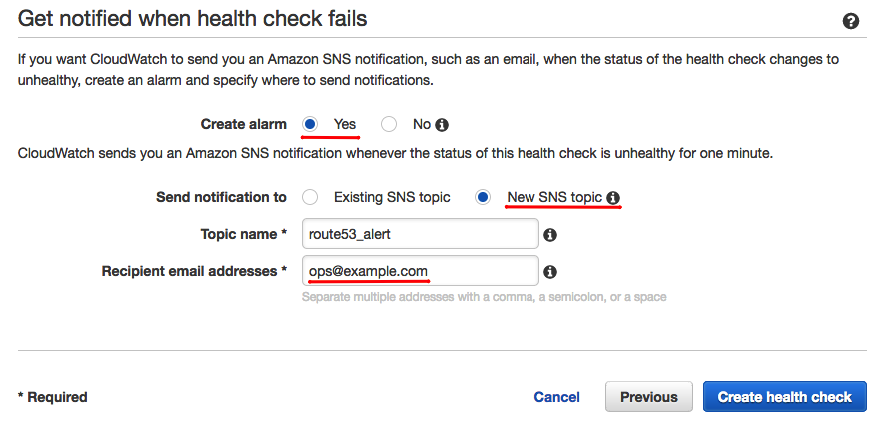
Once you configure the new health check and alarm, the email address you indicated receives a confirmation email from AWS. Route 53 does not execute the health check until you confirm the email address. Once the health check executes, be sure that the monitored site shows 100% health under the Monitoring tab.
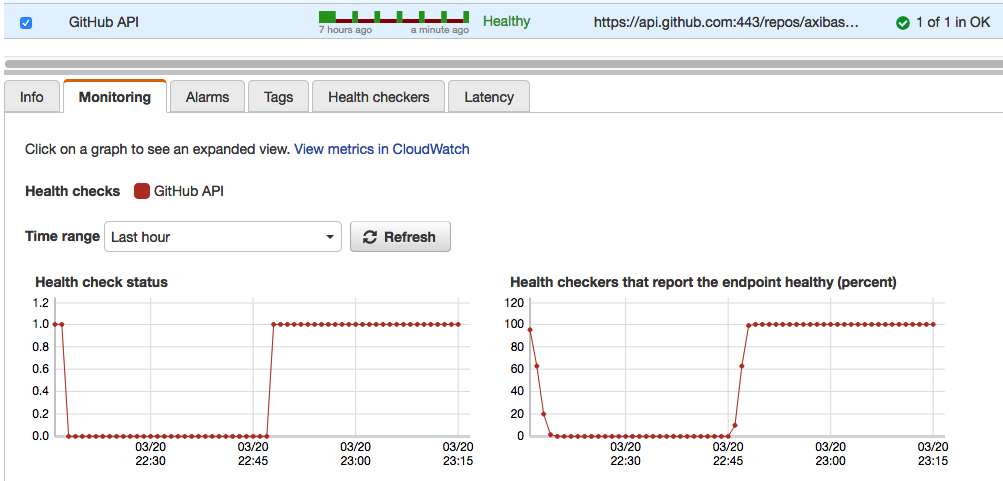
Under the Health Checkers tab, review information in the Status column for each of the Health Checker Regions and resolve any issues.

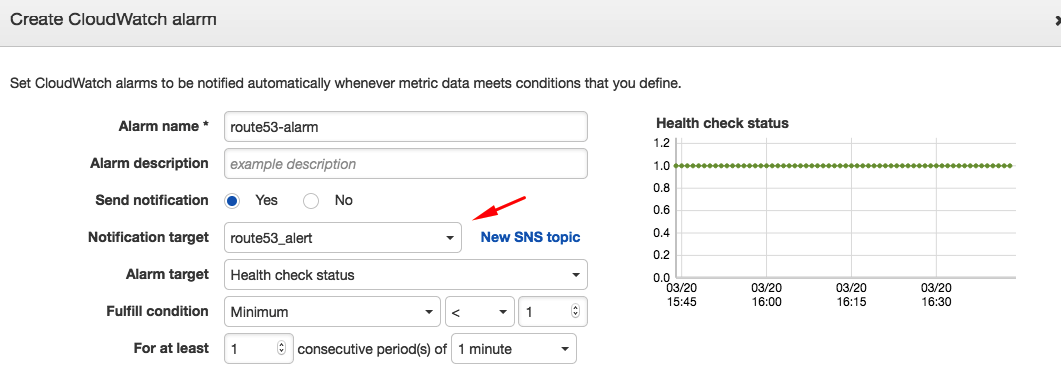
If you have not already, configure the new alarm notification target by navigating to the Alarms tab and clicking the Edit button in the Actions column. Select the appropriate Notification Target from the drop-down list of existing targets.
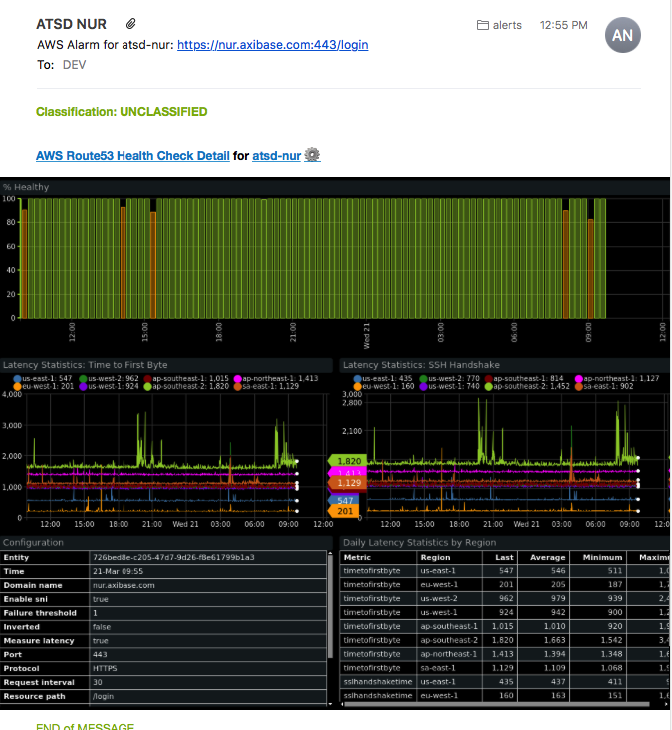
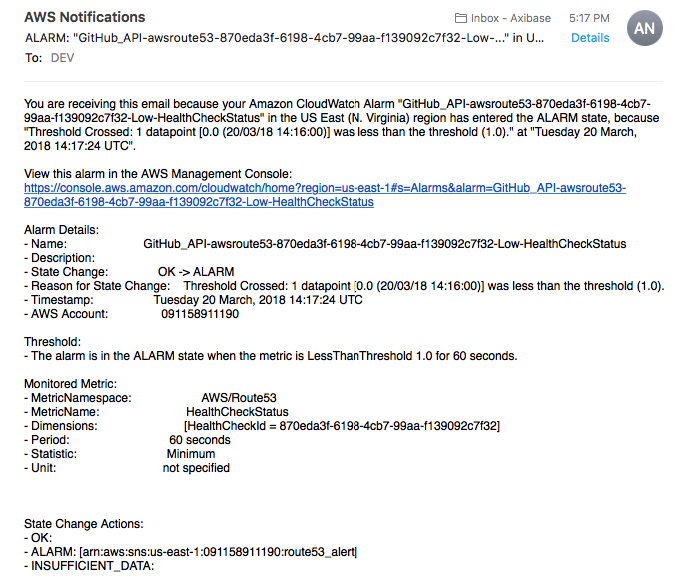
If the endpoint becomes unhealthy and the alarm is triggered by Route 53, the specified email address receives an email notification from AWS similar to the one shown below:
Your health checks and alarms are fully-functioning.
Complete the process below to enhance Route 53 alarms with your local ATSD instance.
Enhancing Alerts with Axibase Time Series Database
Install ATSD sandbox with AWS integration. Configure Mail Client, Webhook user and import
rule-aws-cloudwatch-alarm.xmlusing Dockerruncommand.cat import/mail.propertiesserver=mail.example.org port=587 user=user@example.org password=secretdocker run -d -p 8443:8443 -p 9443:9443 -p 8081:8081 \ --name=atsd-sandbox \ --volume=$(pwd)/import:/import \ --env ATSD_IMPORT_PATH='https://github.com/axibase/atsd-use-cases/raw/master/integrations/aws/route53-health-checks/resources/aws-route53-xml.zip, https://github.com/axibase/atsd-use-cases/raw/master/integrations/aws/route53-email-notifications/resources/rule-aws-cloudwatch-alarm.xml' \ --env COLLECTOR_IMPORT_PATH='https://raw.githubusercontent.com/axibase/atsd-use-cases/master/integrations/aws/route53-health-checks/resources/job_aws_aws-route53. xml' \ --env COLLECTOR_CONFIG='job_aws_aws-route53.xml:aws.properties' \ axibase/atsd-sandbox:latest \ --env EMAIL_CONFIG=mail.properties \ --env WEBHOOK=aws-cwView container start log:
docker log -f atsd-sandboxStart log displays the webhook at the end of the output:
Webhooks created:
Webhook user: aws-cw
Webhook URL: https://aws-cw:password@atsd_hostname:8443/api/v1/messages/webhook/aws-cw?command.date=Timestamp&json.parse=Message&exclude=Signature;    SignatureVersion;SigningCertURL;SignatureVersion;UnsubscribeURL;MessageId;Message.detail.instance-id;Message.time;Message.id;Message.version
Configure ATSD to accept HTTPS requests from AWS infrastructure servers with a CA-signed SSL certificate. Alternatively, use the HTTP protocol when configuring the SNS subscription URL.
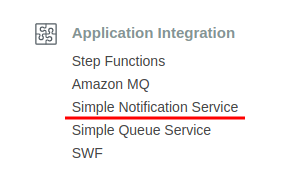
Open the Services drop-down list and navigate to the Simple Notification Service page in the Application Integration section of the menu.
Open the Topics page from the toolbar on the left, and click the ARN link of the alert to integrate.

In the Subscriptions section of the Topic Details page, click Create Subscription to enable enriched emails with contextual information. Click Create Subscription and use the webhook URL in the Endpoint field:
https://aws-cw:password@atsd_hostname:8443/api/v1/messages/webhook/aws-cw?command.date=Timestamp&json.parse=Message&exclude=Signature;SignatureVersion;SigningCertURL;SignatureVersion;UnsubscribeURL;MessageId;Message.detail.instance-id;Message.time;Message.id;Message.versionSwitch to HTTP protocol and modify the port number (default is
8088) if the ATSD is running on a self-signed SSL certificate.Replace
atsd_hostnamewith a valid hostname and update user password in the webhook URL above.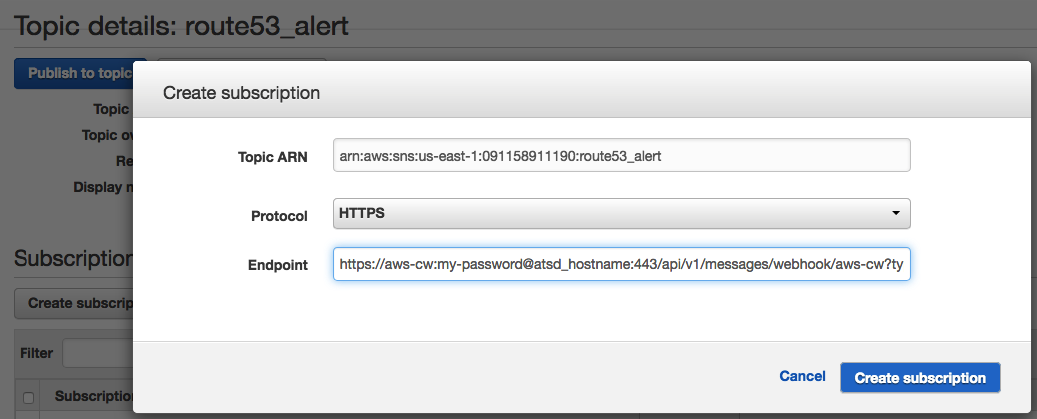
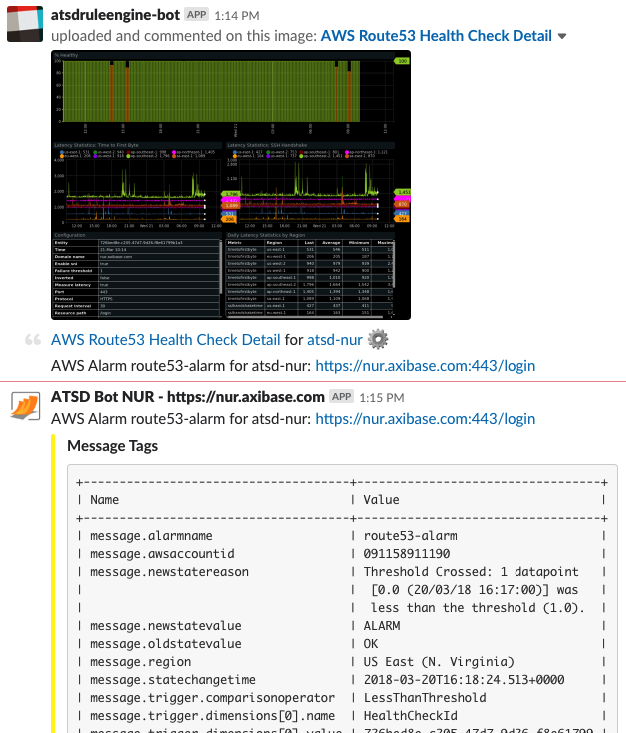
You are ready to start receiving detailed email notifications about endpoint health status alerts.
Follow the optional steps below to further enhance this functionality to send context-rich messages to a collaboration service such as Slack or Telegram.
Alarm Notifications in Slack
- Configure your local ATSD instance to send messages to Slack Messenger by following the Slack Notifications procedure. Now, ATSD sends alarm notifications via Slack Messenger as well as email.
Alarm Notifications in Telegram
- Configure your local ATSD instance to send messages to Telegram Messenger by following the Telegram Notifications procedure. Now, ATSD sends alarm notifications via Telegram Messenger as well as email.
Advanced Configuration
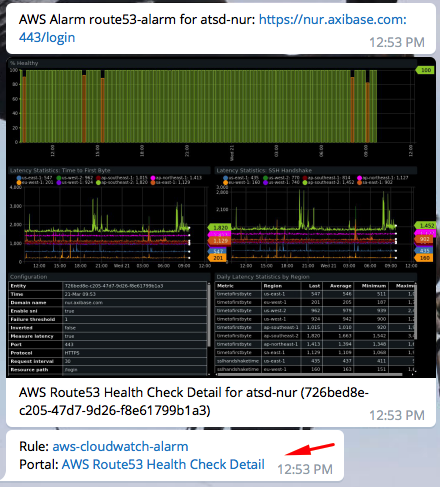
To configure advanced settings, expand the Alerts menu and click Rules. Follow the procedure described by the Notification Attachments Documentation to include detailed reports and portals in your alert emails.
Enable the Attach Details option to include detailed email reports upon alarm notification:

- Enable the Attach Portals option to include complete health check portals upon alarm notification (not only unhealthy endpoints):