SSH Tunnel Setup
User Guide for Setting up an SSH Tunnel
Start by creating a read-only account on the ATSD server as described in the User Account Setup Guide.
The guide uses atsd_hostname as the hostname of the ATSD server.
The guide uses nurswgvml001 as the hostname of the remote system.
In the guide, -p specifies the TCP port of the ATSD server. Indicate the correct available port. For example: -p 22.
Copy the /opt/atsd/id_rsa_atsdreadonly key generated during ATSD installation (or the one created using our User Account Setup Guide) to a remote system into the directory /opt/nmon.
Add the ATSD host to known hosts on the target server:
ssh-keyscan -H atsd_hostname >> ~/.ssh/known_hosts
On Unix systems, the permissions to the key file must not allow any access to world and group. You can achieve this with the command chmod 0600. If the permissions are less strict, the file is ignored and the SSH tunnel fails to start.
Set the permissions and ownership for the user account on remote servers. root privileges are not necessary.
Ensure you have the ownership rights for the SSH key:
ls -l /opt/nmon/id_rsa_atsdreadonly
Change ownership:
sudo chown {currentuser} /opt/nmon/id_rsa_atsdreadonly
Change permissions:
sudo chmod 0600 /opt/nmon/id_rsa_atsdreadonly
Test SSH connection
ssh atsdreadonly@atsd_hostname -i /opt/nmon/id_rsa_atsdreadonly -p 22
Open SSH tunnel
ssh -fN -L `hostname`:10000:localhost:8081 atsdreadonly@atsd_hostname -i /opt/nmon/id_rsa_atsdreadonly -p 22
In the above example, the tunnel is established between local port 10000 on the remote system and local port 8081 on the ATSD server.
If the tunnel is not established, check if you can ping the ATSD server to see if the port is available and if the username and SSH key are set correctly.
Verify that the SSH tunnel is active
ps -ef | grep ssh
The output contains the following line:
user001 31326 1 0 17:30 ? 00:00:00 ssh -fN -L nurswgvml001:10000:localhost:8081 atsdreadonly@atsd_hostname -i /opt/nmon/id_rsa_atsdreadonly
This output means that the SSH tunnel is successfully established.
Stop the SSH tunnel (using the pid from the output above)
kill 31326
Verify the connectivity from a Windows machine (optional step)
Load id_rsa_atsdreadonly into the puttygen program.
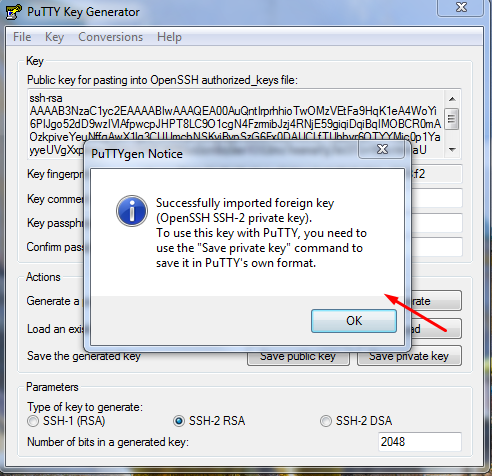
Click Save private key and save the file in *.ppk format to the local disk.
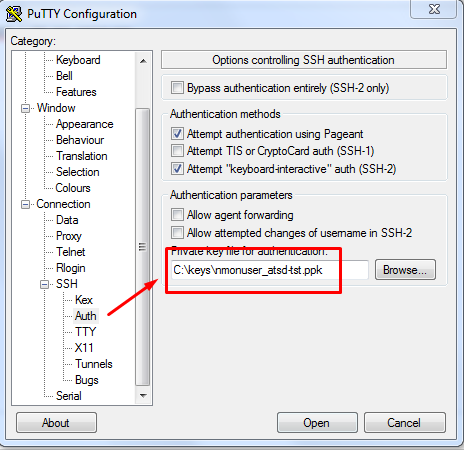
Open the putty client and connect it to the ATSD server under atsdreadonly with the ppk file.
Copy private key to remote systems.
Distribute the generated private key /opt/atsd/id_rsa_atsdreadonly to remote systems collecting nmon data.
Disable login by SSH.
This step disables the remote shell for atsdreadonly, however, it retains the tunneling capability.
sudo nano /etc/passwd
Search for nmonuser entry and replace the shell command as follows:
atsdreadonly:x:1004:1004:,,,:/home/atsdreadonly:/bin/bash
atsdreadonly:x:1004:1004:,,,:/home/atsdreadonly:/bin/false
Verify that you are no longer able to log in to ATSD server with nmonuser credentials:
ssh atsdreadonly@atsd_hostname -i /opt/nmon/id_rsa_atsdreadonly -p 22
If the atsdreadonly shell environment is not available, then the remote login is successfully disabled.