Portals Overview
Reference
Create Portal
Open the Portals tab in the top menu.
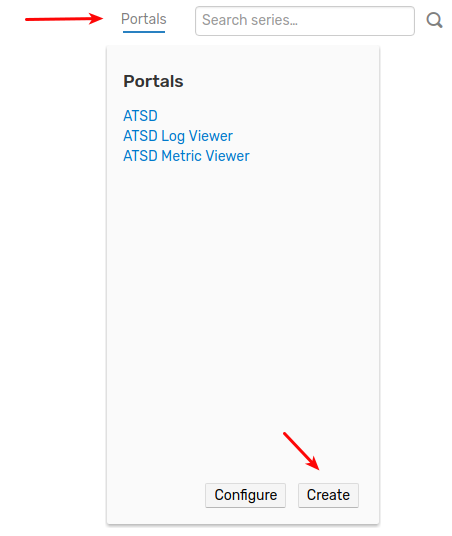
Click Create.
Specify portal settings.
| Property | Description |
|---|---|
| Name | User-friendly portal name. |
| Enabled | Portal status. Disabled portals are not visible to users. |
| Guest Access | Enable anonymous view of the portal. |
| Type | Portal type: regular or template. See type descriptions below. |
| Display Index | Applicable to template portals. The order in which portals are listed on multiple-portal pages. |
| Theme | Graphics style to render the widgets: Default or Black. Custom themes can be installed as described below. |
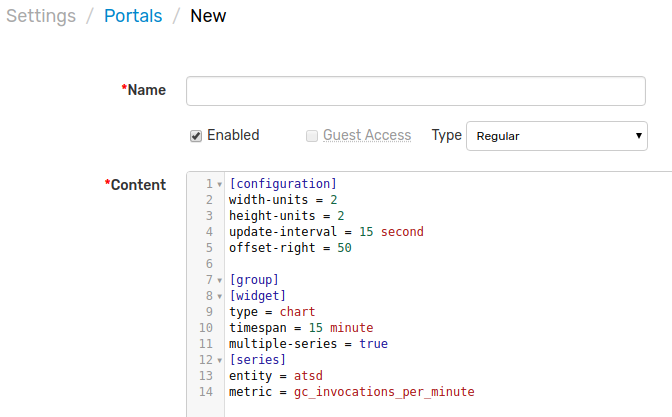
| Content | Portal configuration text specified using the Charts syntax. |
Configure Portal
Syntax
The portal is configured using the Charts syntax which is a domain-specific language for assembling visualizations in a declarative manner. The basic components of the syntax are sections and settings.
- Section is enclosed in square brackets, for example,
[widget]. The section includes settings and nested sections. The section ends when another section is specified. - Setting includes name and value, separated by equal sign, for example,
timespan = 1 hour.
# this is a section named [widget]
[widget]
  # this is a setting that belongs to section [widget]
  timespan = 1 hour
Layout
Widgets are positioned on the portal using a grid layout. The dimensions of the grid are specified under the [configuration] tag using the width-units and height-units settings. Each widgets occupies 1 horizontal and 1 vertical unit by default.
The following example creates a grid containing 6 units, with 3 widgets placed in the first row and 2 placed in the second.
[configuration]
  width-units = 3
  height-units = 2
  # portal-level settings
  # shared widget settings
[group]
  [widget]
     # widget settings
     type = chart
     [series]
       # series settings
       metric = view_count
       entity = example.org
       [tags]
         page_name = index.htm
  [widget]
    type = chart
  [widget]
    type = pie
[group]
  [widget]
    type = chart
  [widget]
    type = chart
Review the following guides describing the basic syntax:
Portals Page
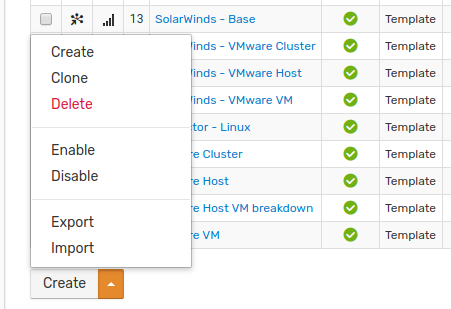
The portals are listed on the Portals page. Click Portals in the top menu and click Configure.
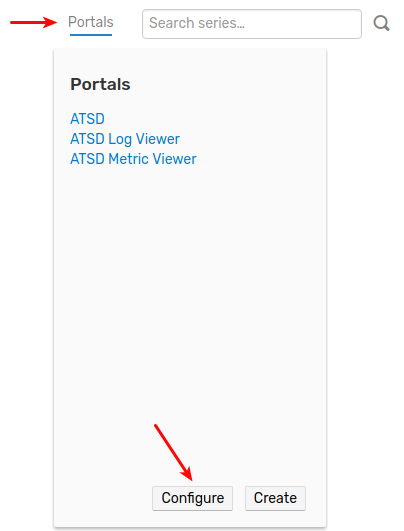

Use the split-button at the bottom of the page to manage portals.
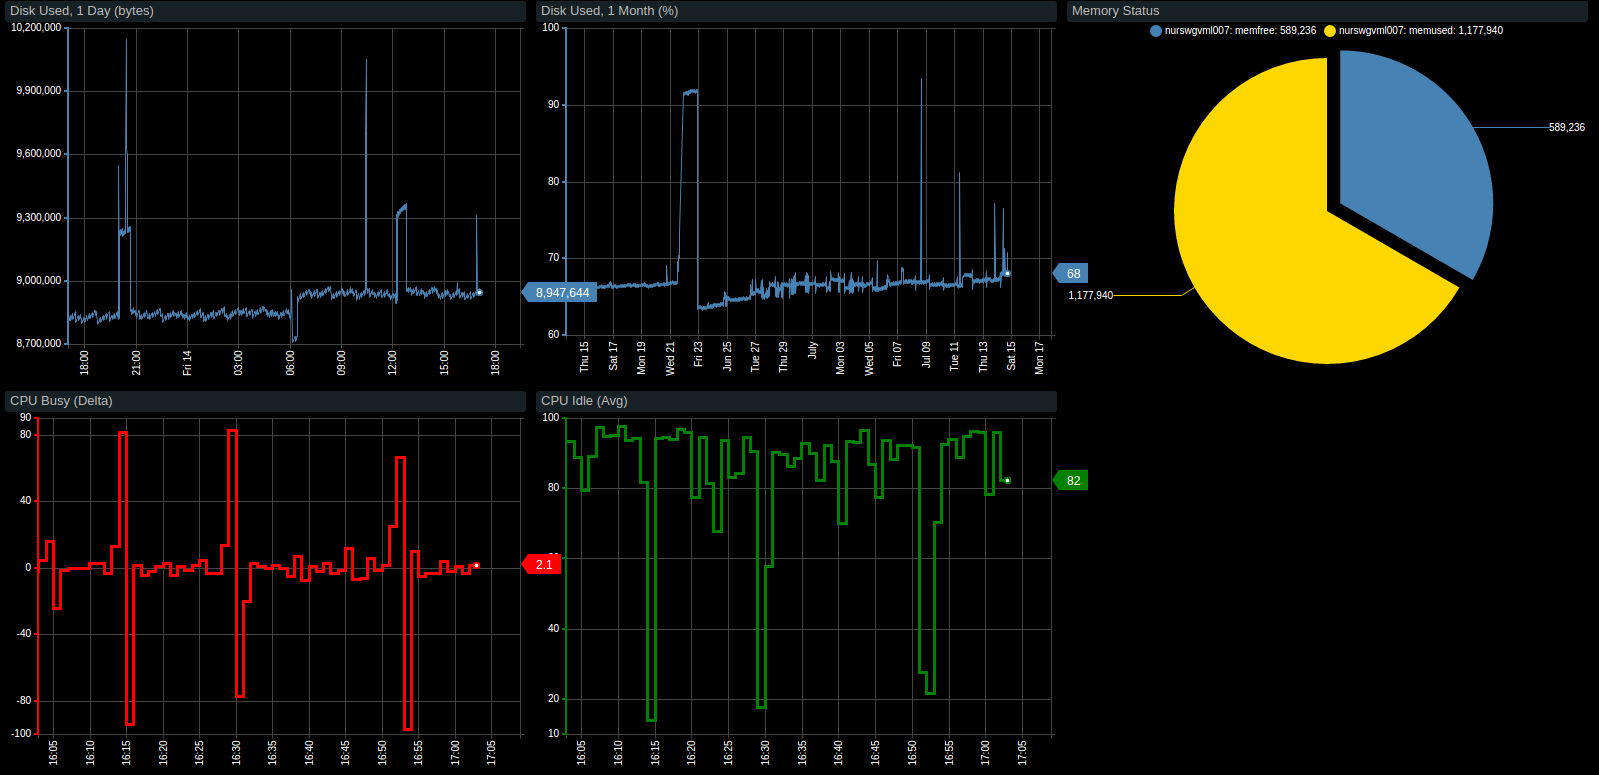
Portal Types
Two types of portals are supported:
Regular Portals
The regular portal does not depend on external parameters and can be rendered without modifications.
Sample link for a regular portal:
https://atsd_hostname:8443/portal/4.xhtml
Enabled regular portals are listed under the Portals link in the top menu.

Template Portals
The template portal requires an entity name to be passed as a request parameter. It allows the same parameterized portal to be viewed for all entities of the same type.
Additional parameters can be passed in the query string to customize the portal as described below.
Sample link to a template portal using portal identifier:
https://atsd_hostname:8443/portal/{portal-id}.xhtml?entity={entity}
Sample link to a template portal using portal name:
https:///atsd_hostname:8443/portal/name/{portal-name}?entity={entity}
The above links contain the entity parameter which substitutes all ${entity} placeholders in the portal configuration text when rendered.
[widget]
  type = chart
  [series]
    metric = jmx.derby.hitcount
    # replaced with request parameter
    entity = ${entity}
The actual configuration displayed replaces the ${entity} placeholder with the parameter value as follows:
[widget]
  type = chart
  [series]
    metric = jmx.derby.hitcount
    entity = nurswgvml013
To open a template portal in the browser, substitute the {portal-id} below with portal identifier displayed at the Portals Page and specify a valid entity name in the {entity} request parameter.
https://atsd_hostname:8443/portal/{portal-id}.xhtml?entity={entity}
Alternatively, assign an entity group to the template portal to ensure that a link to this portal is available on the Entities page for all entities that are members of the entity group:
Open the Portals Page.
Click the assign icon for the selected template portal.
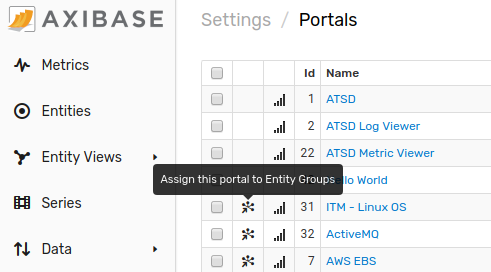
Select entity groups to assign the portal.
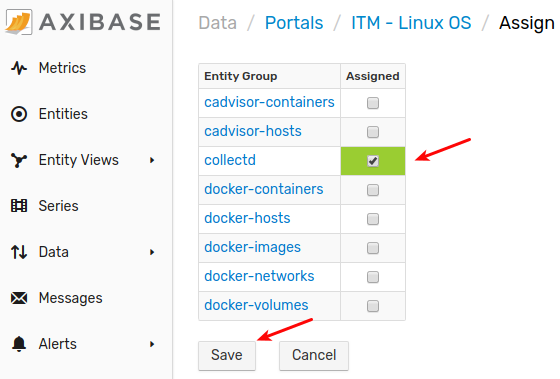
Note an entity group can be assigned to the portal from portal editor:
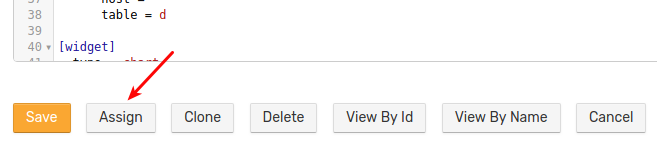
Click Save at the bottom of the page.
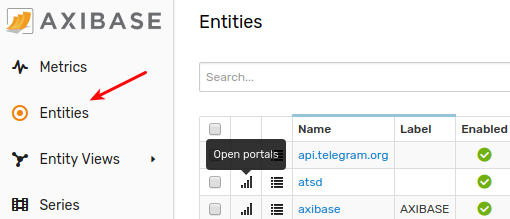
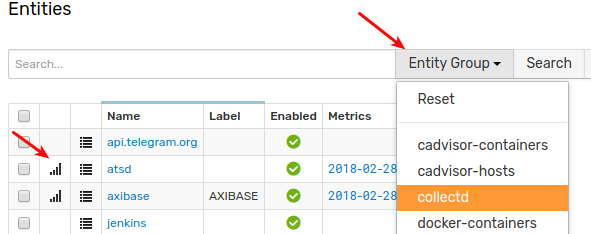
Open the Entities page.
Select an entity group in the drop-down filter.
Click the portals icon for an entity and verify that the portal is assigned.
Portal Links
The portals are available at the following URLs:
- Using portal id displayed at the Portals Page:
https://atsd_hostname:8443/portal/{portal-id}.xhtml

- Using portal name (case-sensitive):
https://atsd_hostname:8443/portal/name/{name}
Names containing space, tab, or special characters must be URL-encoded.

Request Parameters
The template portal requires the entity parameter to be present in the query string regardless if the portal is accessed with an identifier or name.
https://atsd_hostname:8443/portal/name/linux-os?entity=nurswgvml008
Additional parameters can be passed in the query string to customize the portal.
# additional parameter: dtype
https://atsd_hostname:8443/portal/name/linux-disk?entity=nurswgvml008&dtype=nfs
Such request parameter values can be referenced with ${parameter_name} placeholders in the Configure Portal text.
[series]
  metric = disk_io_writes
  entity = ${entity}
  [tags]
    disk_type = ${dtype}
    disk_name = *
Portal Themes
| Default Theme | Black Theme |
|---|---|
 |  |
You can create a new theme by changing the default CSS theme files and copying the modified files to the /opt/atsd/conf/portal/themes/ directory.
Custom themes are automatically displayed in the Themes drop-down list in the portal editor.