Jenkins Integration
Overview
The following example demonstrates how to trigger a Jenkins job using a CUSTOM webhook in the ATSD rule engine.
The integration relies on the following Jenkins API methods:
- Job with parameters method.
- Jobs without parameters method.
Configuration
Create a new CUSTOM webhook from scratch or import the following template, used in this example.
To import the XML template file, open the Alerts > Outgoing Webhooks page, select Import in the split-button located below the table and complete the upload form.
To create a new notification, open the Alerts > Outgoing Webhooks page and click Create.
Parameters
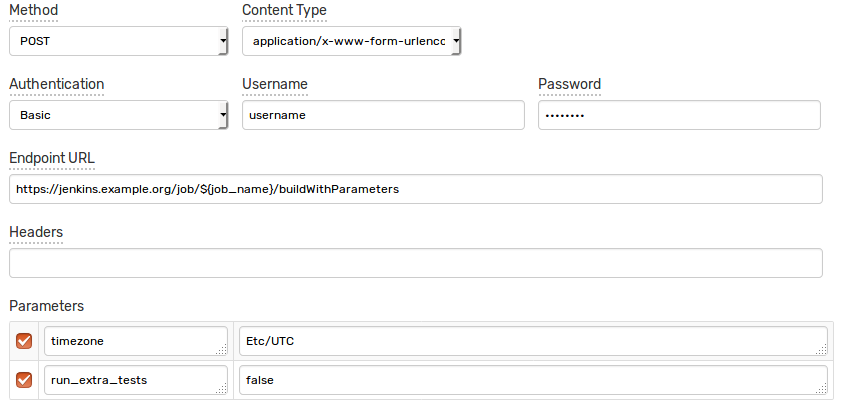
Enter a name and specify the following parameters:
| Name | Value |
|---|---|
| Method | POST |
| Content Type | application/x-www-form-urlencoded |
| Authentication | Basic |
| Username | <JENKINS_USER_NAME> |
| Password | <JENKINS_USER_TOKEN> |
| Endpoint URL | https://jenkins.example.org/job/${job_name}/buildWithParameters |
If the Jenkins job is not parameterized, use the https://jenkins.example.org/job/${job_name}/build URL.
Replace jenkins.example.org in the Endpoint URL parameter with the actual Jenkins address.
Keep the ${job_name} placeholder in the URL path to ensure that the job name can be customized in the rule editor. This allows you to trigger different jobs using the same webhook.
Enter the Jenkins user name into the Username field and the User API token into the Password field.
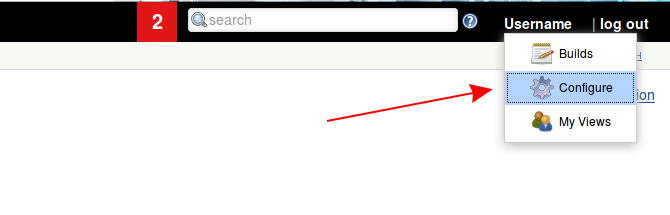
The API token can be located on the User Configuration page in the Jenkins web interface.
Click Show API Token.

Your token is displayed in the API Token field.

Payload
If your Jenkins job is parameterized, you can send the additional parameters in the request payload.
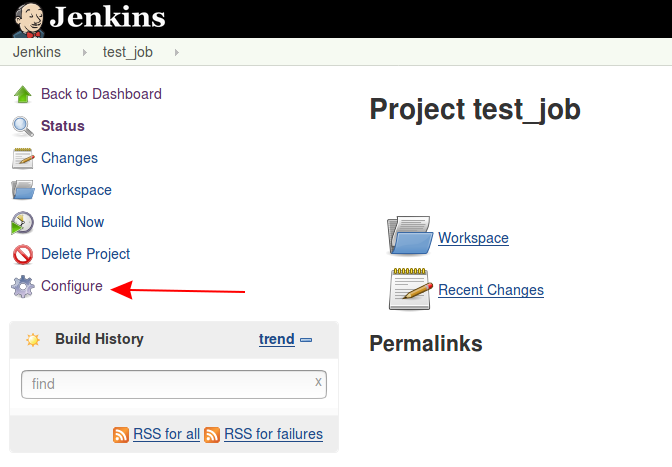
To inspect which parameters are exposed by the project, open the job configuration page in Jenkins.
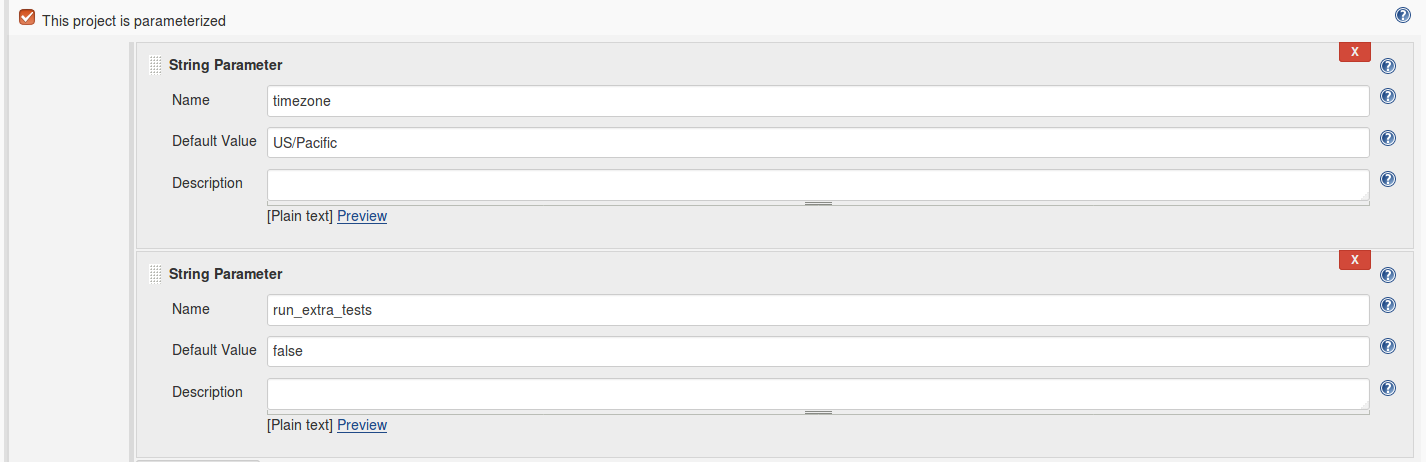
The parameters are displayed if This project is parameterized checkbox is enabled.
The webhook can be configured to send a x-www-form-urlencoded data to the Jenkins server to pass extended parameters.
In this case, add parameters names to the Parameters and enable their checkboxes to customize them in the rule editor.
Leave the Parameters table empty for non-parameterized jobs.
Rule
Create a new rule or import the rule template used in this example. To import the XML template file, open the Alerts > Rules page, select Import in the split-button located below the table and complete the upload form.
To create a new rule, open the Alerts > Rules page and click Create.
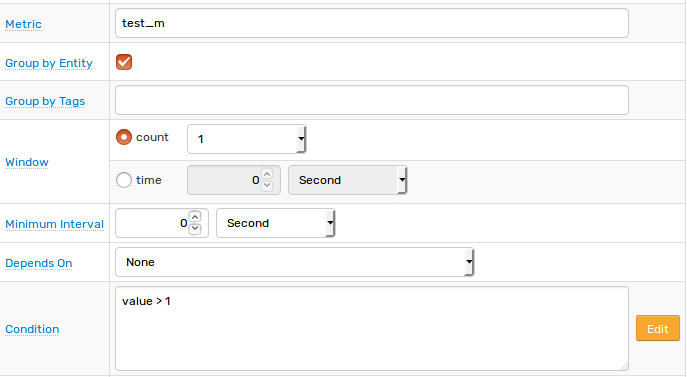
Specify the key settings on the Overview tab.
| Name | Value |
|---|---|
| Status | Enabled |
| Metric | test_m |
| Condition | value > 1 |
Open the Webhooks tab.
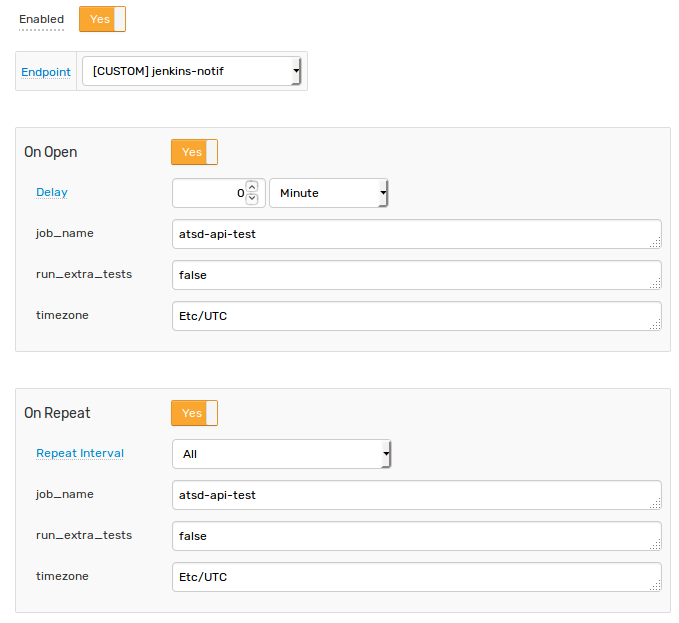
Set Enabled to Yes and choose the previously created webhook from the Endpoint drop-down.
Enable Open and Repeat triggers. Set the Repeat Interval to All.
Specify the same settings for the Open and Repeat triggers:
| Name | Value |
|---|---|
job_name | atsd-api-test |
run_extra_tests | false |
timezone | Etc/UTC |
Note that these three parameters are visible in the rule editor because their placeholders are present in the Endpoint URL and Parameters are marked as editable.
When the webhook is executed, all placeholders are resolved as follows:
https://jenkins.example.org/job/atsd-api-test/buildWithParameters
timezone=Etc/UTC
run_extra_tests=false
If the placeholder is not found, the placeholder is replaced with an empty string.
Test
Test the integration by submitting a sample series command on the Data > Data Entry page.
series e:test_e m:test_m=2

The value causes the condition to evaluate to true, which in turn triggers the notification.
To verify that an alert is raised, open the Alerts > Open Alerts page and check that an alert for the test_m metric is present in the Alerts table.

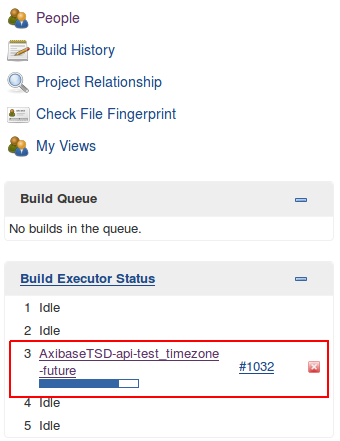
Check the Jenkins web interface to ensure the target build is triggered.