Telegram Notifications
Overview
TELEGRAM webhook allows sending text messages and chart screenshots to Telegram groups and channels using the Telegram Bot API.
Reference
- Prerequisites
- Bot API Token
- Sending Messages to User
- Sending Messages to Group
- Sending Messages to Private Channel
- Sending Messages to Public Channel
- Configure Webhook in ATSD
- Proxy Settings
- Webhook Settings
- Reacting to Bot Messages
- Testing Rule
- Examples
Prerequisites
Configure the Web Driver to be able to send chart screenshots.
Bot API Token
- Start a conversation with the built-in BotFather user.
- Send the
/mybotscommand to view existing bots and their API tokens. - Alternatively, create a new bot with the
/newbotcommand. - Take note of the bot API token.
Sending Messages to User
Open
https://api.telegram.org/bot<BOT_API_TOKEN>/getUpdateslink.Send a direct message to the bot, or ask another user to message the bot.
Refresh the
getUpdateslink above and take note ofchat.idfor the user's private conversation with the bot.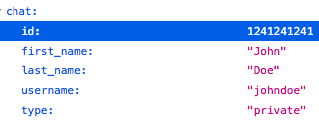
Sending Messages to Group
Click Group Settings > Add Members.
Enter the bot name, select the bot, click Invite.
Open
https://api.telegram.org/bot<BOT_API_TOKEN>/getUpdateslink.Send a message to the group.
Refresh the
getUpdateslink above and take note ofchat.idfor the group. The chat id for groups is a negative number.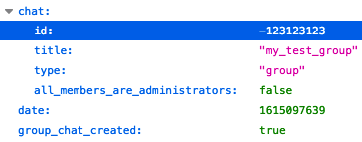
Sending Messages to Private Channel
Click Channel Settings > Manage Channel.
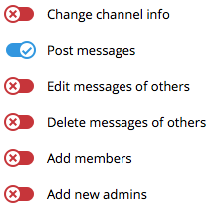
In the Manage Channel window, click Administrators > ADD ADMINISTRATOR.
Enter the bot name, and confirm the action.
Review permissions, ensure that only Post messages is enabled.
Open
https://api.telegram.org/bot<BOT_API_TOKEN>/getUpdateslink.Send a message to the private channel.
Refresh the
getUpdateslink above and take note ofchat.idfor the channel. The chat id for private channels is a negative number.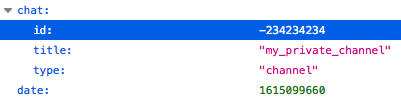
Sending Messages to Public Channel
Click Channel Settings > Manage Channel.
In the Manage Channel window, click Administrators > ADD ADMINISTRATOR.
Enter the bot name, and confirm the action.
Review permissions, ensure that only Post messages is enabled.
Configure Webhook in ATSD
Open the Rule Engine > Outgoing Webhooks page.
Click an existing
TELEGRAMtemplate, or click Create and selectTELEGRAM.Specify the unique
Nameof the notification.
Enter the
BOT_TOKENvalue into the Bot API Token field.Specify Chat ID:
Enter channel name as
@channel_namefor public channels
Enter chat id for private channels, groups, and users

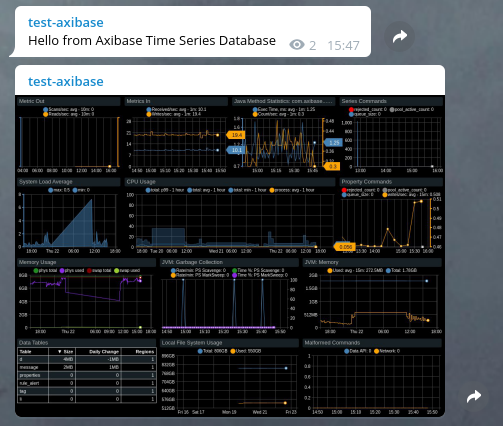
Click Test to send a sample message.
If Web Driver is installed, select Test Portal to verify chart delivery.
Click Save.
Proxy Settings
If the Telegram API server is inaccessible from the ATSD server, open the Network Settings section and specify proxy parameters.
NGINX API Gateway Path for Telegram:
location /bot {
    proxy_pass https://api.telegram.org/bot;
}
Webhook Settings
| Setting | Description |
|---|---|
| Bot API Token | Unique authentication token assigned to the bot. |
| Chat ID | Chat id in case of group, user, or private channel. Channel name with @ prefix in case of public channel. |
| Text | Message text to be sent. Leave the field blank to make the field editable in the rule editor. |
| Notifications | If enabled, delivers the message with an audio notification. |
| Web Page Preview | If enabled, displays short previews for URLs in the message. |
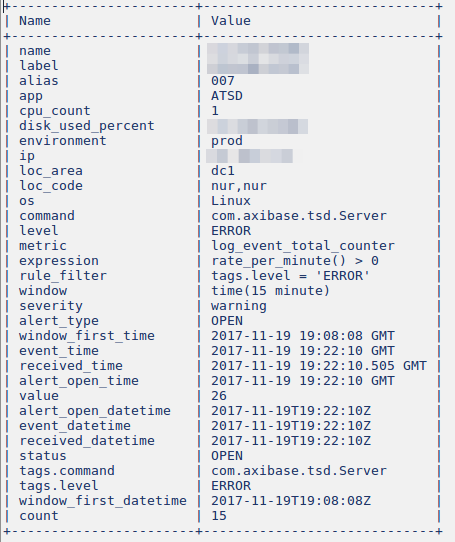
| Details Table Format | The default format for the alerts detail table. |
Markdown
Parse mode is set to markdown by default.
Reacting to Bot Messages
Use the bot account to deliver notifications to end users and react to messages addressed to the bot itself.
To process incoming messages, configure an outgoing webhook or set Receive Updates setting to yes and Method to Polling. The webhook integration requires ATSD server to be reachable from Telegram API servers.
Testing Rule
Create/import rule
- Create a new rule or import an existing rule for a built-in metric as described below.
- Download
rules.xml. - Open the Alerts > Rules > Import page.
- Check Auto-enable New Rules, attach the
rules.xmlfile, click Import.
Configure Webhook
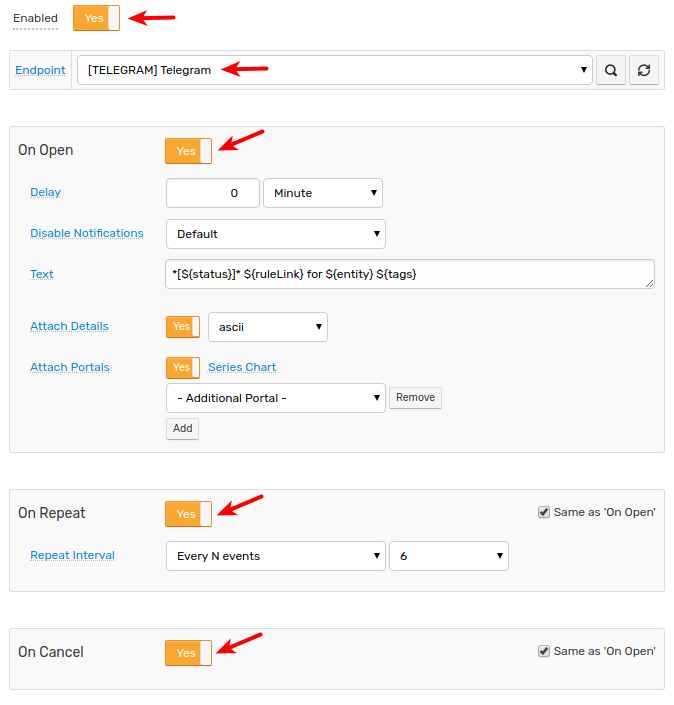
- Open the Alerts > Rules page and select a rule.
- Open the Webhooks tab.
- Select Telegram from the Endpoint drop-down list.
- Enable the
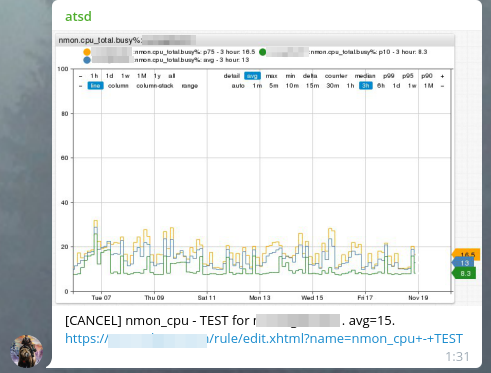
OPEN,REPEAT, andCANCELtriggers. - Customize the alert message using placeholders if needed, for example:
*[${status}]* ${ruleLink} for ${entity} ${tags}
Click Save.
The rule creates a new window when commands are received by the database.
It can take a few seconds for the first commands to arrive and to trigger the webhook. Open and refresh the Alerts > Open Alerts page to verify that an alert is open for your rule.
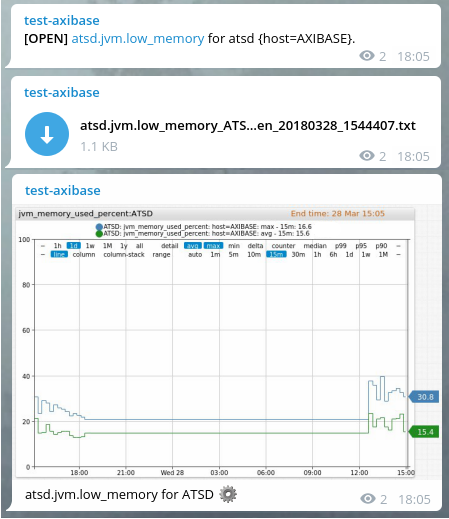
Test
- Check channel messages.
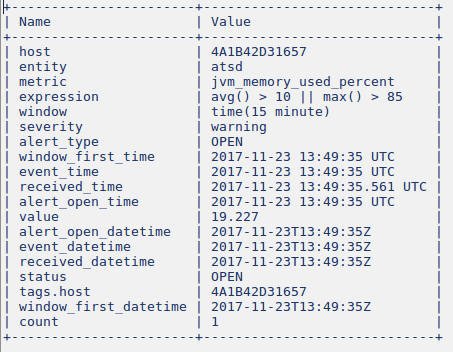
Sample alert table file.
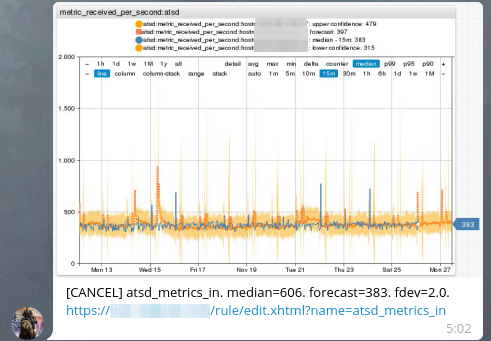
Examples