Discord Notifications
Overview
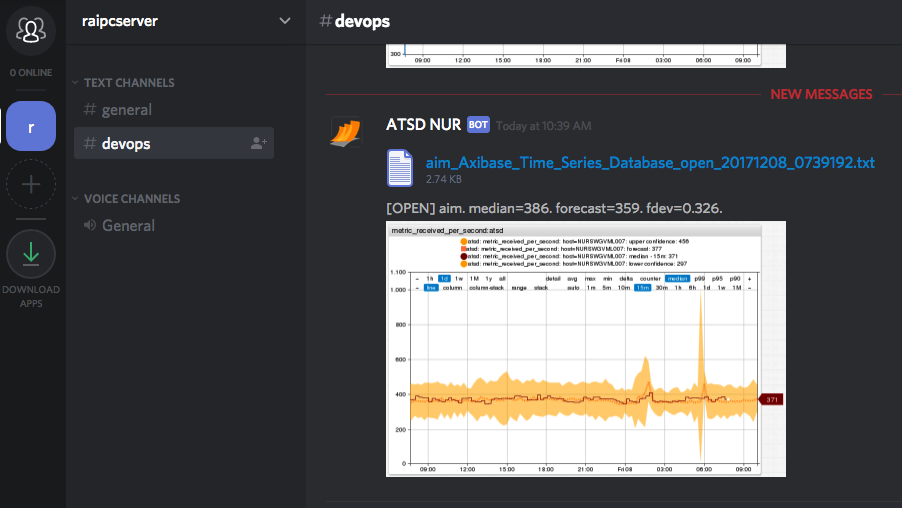
DISCORD webhook sends alert messages, alert detail tables, and charts into Discord channels. This integration is based on the Discord Webhook API.
Security
WARNING
- Note that image and file attachments in Discord messages cannot be securely shared at this time (API v6).
- The attachments, even if sent to a private server, are accessible by any unauthorized user via the URL.
Prerequisites
Install and configure the Web Driver to send chart screenshots into Discord.
Create Discord Server
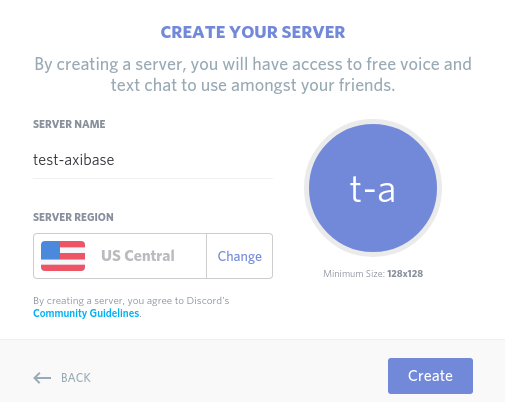
Configure a new Discord server, if necessary.
Click the plus icon in the left panel.

Click Create a Server.

Specify Server Name. Click Create.
Configure the server for private access.
Invite new members to the server, click Done.
Create Channel
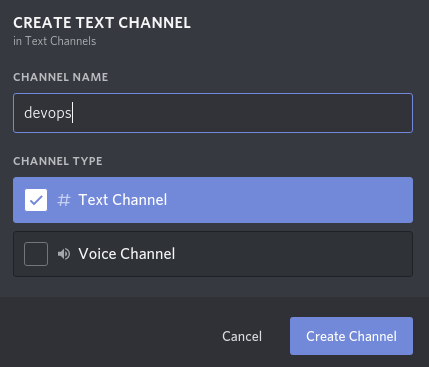
Click Create Channel.

Specify Channel name, select Text Channel, and click Create Channel.
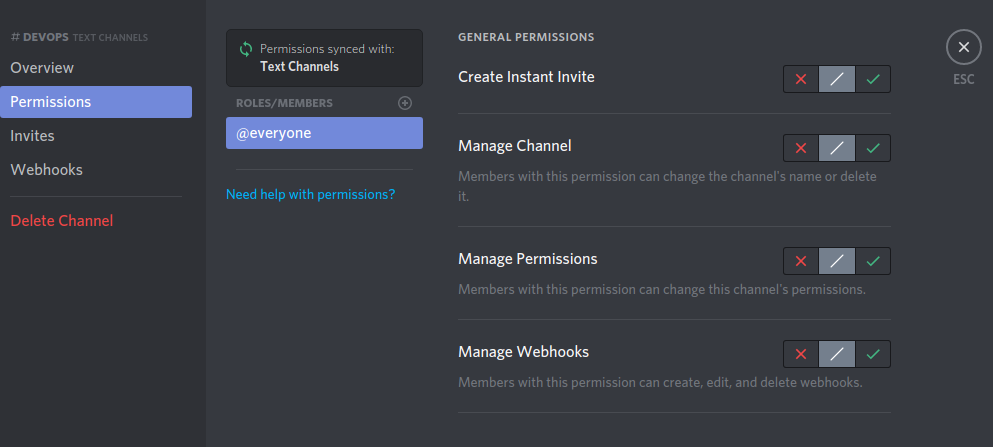
Click Edit channel.

Open the Permissions tab and review the settings.
On the Invite tab, create an invitation link and distribute it to new users.
To join a server, click Create new server, select Join and paste the received invitation link.
Create Webhook in Discord
Open the Webhook tab, click Create Webhook, enter a name and select a channel.
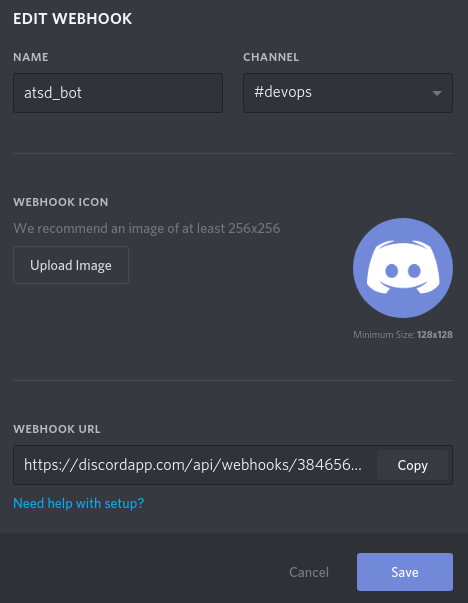
Copy the Webhook URL for future reference and click Save.
Create Webhook in ATSD
Open the Alerts > Outgoing Webhooks page.
Click an existing
DISCORDtemplate, or click Create and select theDISCORDtype.Specify the unique
Nameof the notification.
Copy the Webhook URL from the Discord client to the Webhook URL field in the configuration form.
Webhook ID and Webhook Token are filled automatically when you finish editing the Webhook URL field.
Select Test Portal to test the screenshot.
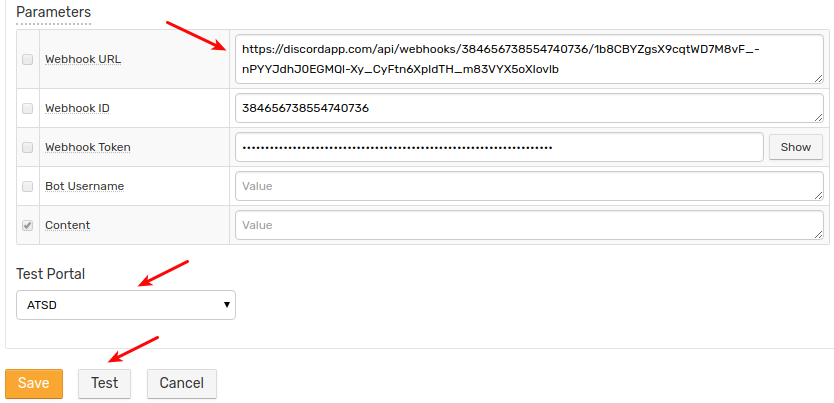
Click Test.
If test is passed, set the status Enabled and click Save.
Proxy Settings
If the Discord API server is not accessible from the ATSD server, open the Network Settings section and specify proxy parameters.
NGINX API Gateway Path for Discord:
location /api/webhooks {
  proxy_pass https://discordapp.com/api/webhooks;
}
Webhook Parameters
| Parameter | Description |
|---|---|
| Webhook URL | Webhook URL generated on the Webhook tab in channel settings. The URL is cleared when the configuration is saved. |
| Webhook ID | The ID of the webhook. Automatically resolved from Webhook URL. |
| Webhook Token | The secure token of the webhook. Automatically resolved from Webhook URL. |
| Bot Username | Overwrite your bot user name. |
| Content | Message text to be sent. Leave this field blank to make the field editable in the rule editor. |
Testing
Create or Import a Rule
- Create a new rule or import an existing rule for a built-in metric as described below.
- Download the file rules.xml.
- Open the Alerts > Rules > Import page.
- Check Auto-enable New Rules, attach the
rules.xmlfile, click Import.
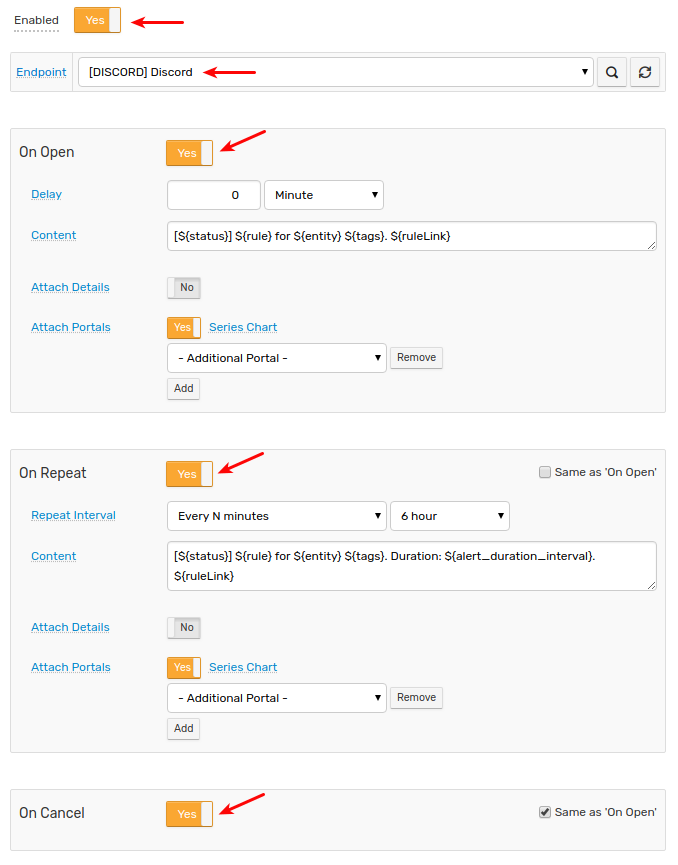
Configure Webhook
- Open the Alerts > Rules page and select the imported rule.
- Open the Webhooks tab.
- Select Discord from the Endpoint drop-down.
- Enable the
OPEN,REPEAT, andCANCELtriggers. - Customize the alert message using placeholders as necessary, for example:
OPEN = [${status}] ${rule} for ${entity} ${tags}. ${ruleLink}
REPEAT = [${status}] ${rule} for ${entity} ${tags}. Duration: ${alert_duration_interval}. ${ruleLink}
CANCEL = [${status}] ${rule} for ${entity} ${tags}. Duration: ${alert_duration_interval}. ${ruleLink}
Click Save.
The rule creates new windows when new commands are received by the database.
It can take a few seconds for the first commands to arrive and trigger notifications. Open and refresh the Alerts > Open Alerts page to verify that an alert is open for your rule.
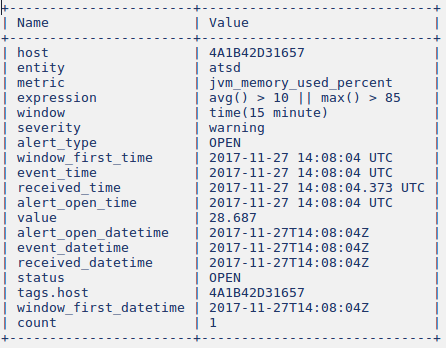
Examples
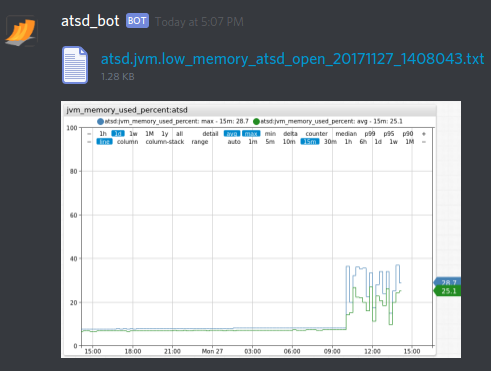
Content of atsd.jvm.low_memory_atsd_open_20171127_1408043.txt: