Outgoing Webhooks
Webhooks provide a mechanism for sending event notifications to external web services.
They can be programmed to send an alert to Slack, update a bug tracker, start a CI build, publish an event to an AWS SNS topic, or even control an IoT device.
Messaging Webhooks
Webhooks for messaging and collaboration services deliver alerts and charts to targeted subscribers.
| Type | Send Message | Send Chart | Integration Model | Hosting Model |
|---|---|---|---|---|
| SLACK | Yes | Yes | Slack Bot API | Cloud |
| TELEGRAM | Yes | Yes | Telegram Bot API | Cloud |
| DISCORD | Yes | Yes | Discord API | Cloud |
| HIPCHAT | Yes | Yes | HipChat Data Center API | Self-hosted |
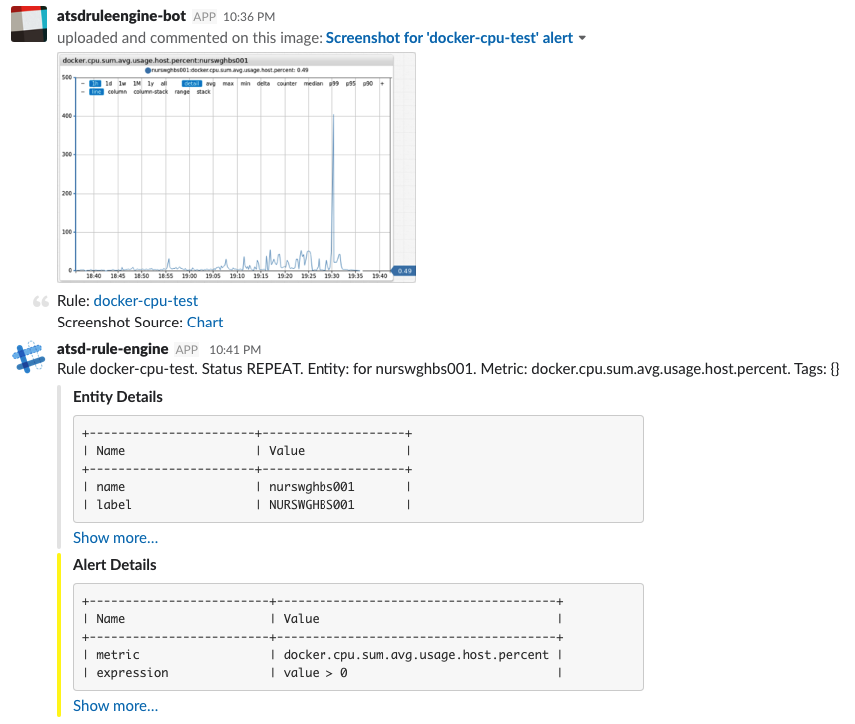
Example: Slack Alert
Integration Webhooks
| Type | Customizable Fields | Description |
|---|---|---|
| AWS-API | All | Integrate with AWS. |
| AWS-SNS | Topic, Message and Subject | Publish a message to an AWS SNS topic. |
| AWS-SQS | Queue and Message | Send a message to an AWS SQS queue. |
| AZURE-SB | Queue/Topic and Message | Send a message to an Azure Service Bus |
| GCP-PS | Topic and Message | Send a message to a Google Cloud Pub/Sub topic. |
| WEBHOOK | None | Send pre-defined fields as a JSON document or form to an HTTP endpoint. |
| CUSTOM | All | Send any JSON content or form parameters to an HTTP endpoint. Examples: pagerduty, zendesk, github, circleci, jenkins, ifttt |
Creating Notifications
Notifications are triggered on window status events.
Open the Alerts > Outgoing Webhooks page and click Create.
Select the webhook type in the drop-down.
Set the status to Enabled.
Enter a name by which the webhook is listed on the Webhooks tab in the rule editor.
Payload
The payload is determined by the webhook type. Typically the payload is text content in the form of a JSON document or form fields. Some webhook types support sending chart screenshots as image files in addition to text content.
Web Driver
If the selected webhook type supports sending chart screenshots, configure the web driver.
Parameters
Each webhook type supports its own set of settings:
- Fixed settings that can not be customized in the rule editor.
- Editable settings which can be changed in the rule editor.
The customizable settings are marked with an enabled checkbox.
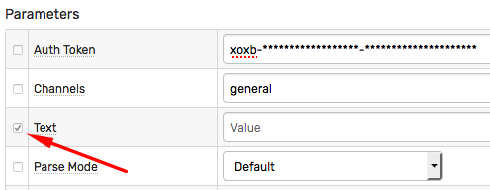
The administrator can specify which settings are fixed and which can be modified in the rule editor.
For example, an API Bot identifier or authentication token is a fixed setting, whereas the channel name and the text message are customizable.
Testing Notifications
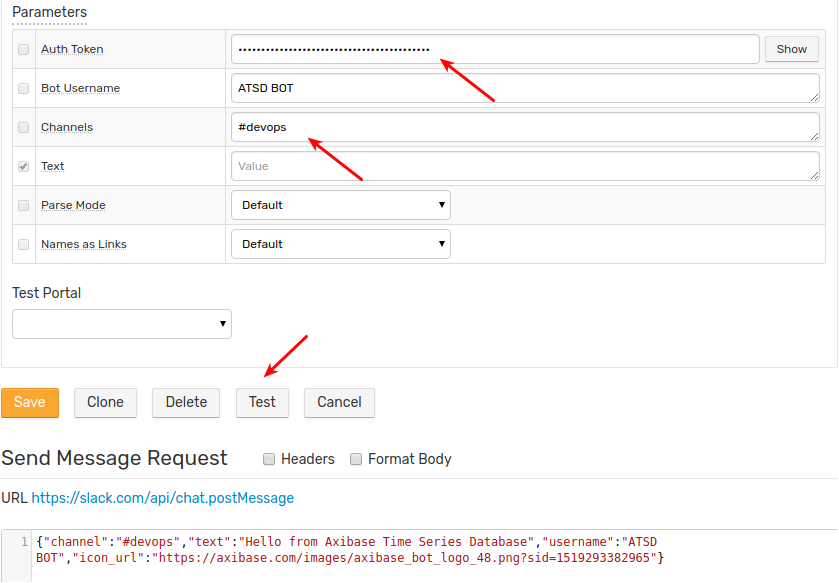
Fill out the required fields for the given webhook type.
Click Test to verify the delivery.
If the webhook supports sending charts, select one of the portals from the Test Portal drop-down.
The webhook request is successful if the endpoint returns HTTP 2xx status code.
Enabling Notifications
Open the Alerts > Rules page.
Select a rule by name, open the Webhooks tab in the rule editor.
Choose one of the webhooks from the Endpoint drop-down list.
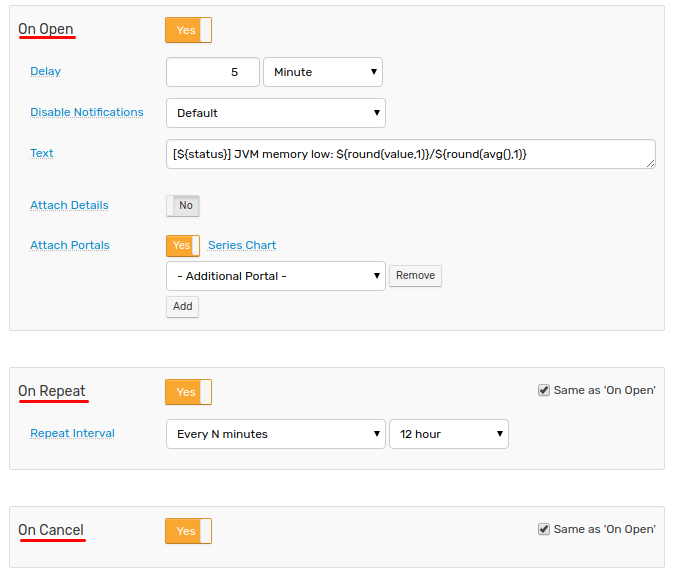
Configure when to execute the webhook by enabling triggers for Open, Repeat, and Cancel events.
Multiple Endpoints
The rule can be programmed to send notifications to multiple endpoints for the same event.
Jitter Control
The Delay on 'OPEN' setting allows deferring the trigger fired for the OPEN status. This is accomplished by deferring an OPEN notification and cancelling it in case the window status reverts to CANCEL within the specified grace interval.
This setting can be used to reduce alert jitter when the window alternates between the OPEN and CANCEL status.
Repeat Alerts
If the window remains in the REPEAT status, it can be configured to repetitively trigger the webhook with the following frequency:
| Frequency | Description |
|---|---|
| All | The webhook is triggered each time the window is updated and remains in the REPEAT status (expression continues to be true). |
| Every N events | The webhook is triggered every Nth occurrence of the new data being added to the window. |
| Every N minutes | The webhook is triggered when the window is updated but no more frequently than the specified interval. |
Message Text
The editor displays a Text field where the alert message can be customized with placeholders.
Sample alert message with placeholders:
[${status}] ${rule} for ${entity} ${tags}.
The alert message can include links to ATSD resources using link placeholders such as the ${chartLink}.
${chartLink}
Utilize control flow statements for conditional processing.
*[${tags.status}]* <${entityLink}|${ifEmpty(entity.label, entity)}> Ω <${getEntityLink(tags.docker-host)}|${ifEmpty(getEntity(tags.docker-host).label, tags.docker-host)}>

@if{is_launch}
  ${addTable(entity.tags, 'ascii')}
@end{}
Attachments
Attachment options are displayed in the rule editor if supported by the given webhook type.
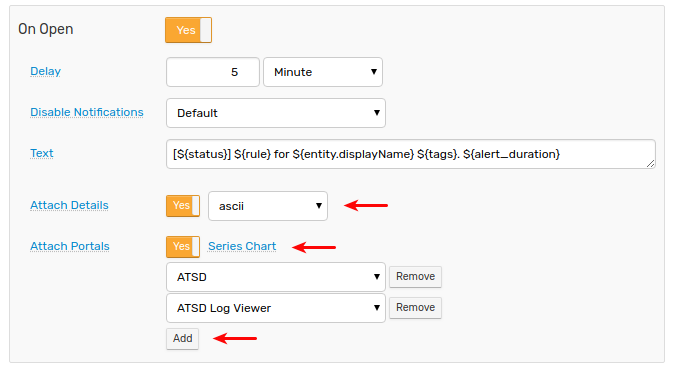
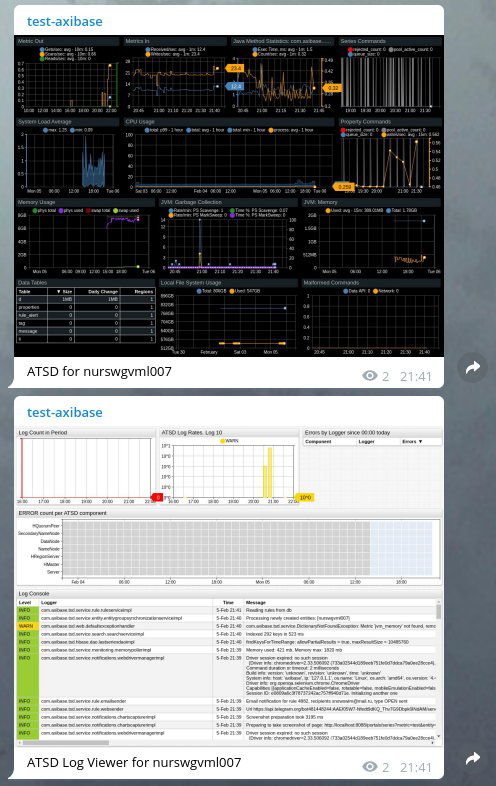
Attach Portals
The Attach Portals option sends one or more portals as an image to the target chat channel/group/user.
If the selected portal is a template portal, its entity, metric, and series tags are resolved from the alert details in the current window.
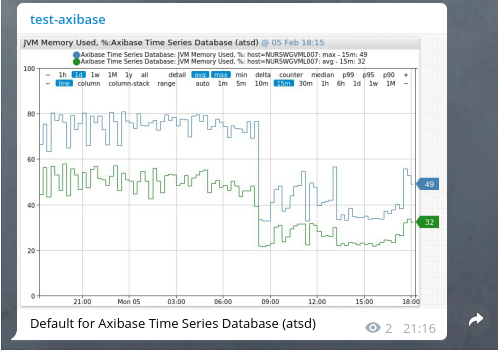
Attach Chart
The Series Chart option sends the default portal for the metric, entity and series tags in the current window.
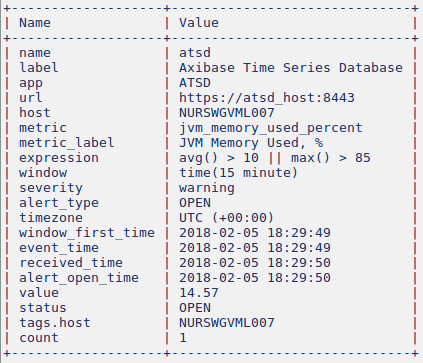
Attach Details
The Attach Details option sends an alert details table as a separate message with a choice of formats.
Multiple Endpoints
To send requests to multiple endpoints for the same status change event, add multiple webhooks in the rule editor.
The order in which webhooks are delivered is non-deterministic.
Delivery Control
Stopping Messages
The rule engine ignores alerts initiated for disabled webhooks.
To disable sending alerts from any rule through the selected webhook, set its status to Disabled on the Alerts > Outgoing Webhooks page.
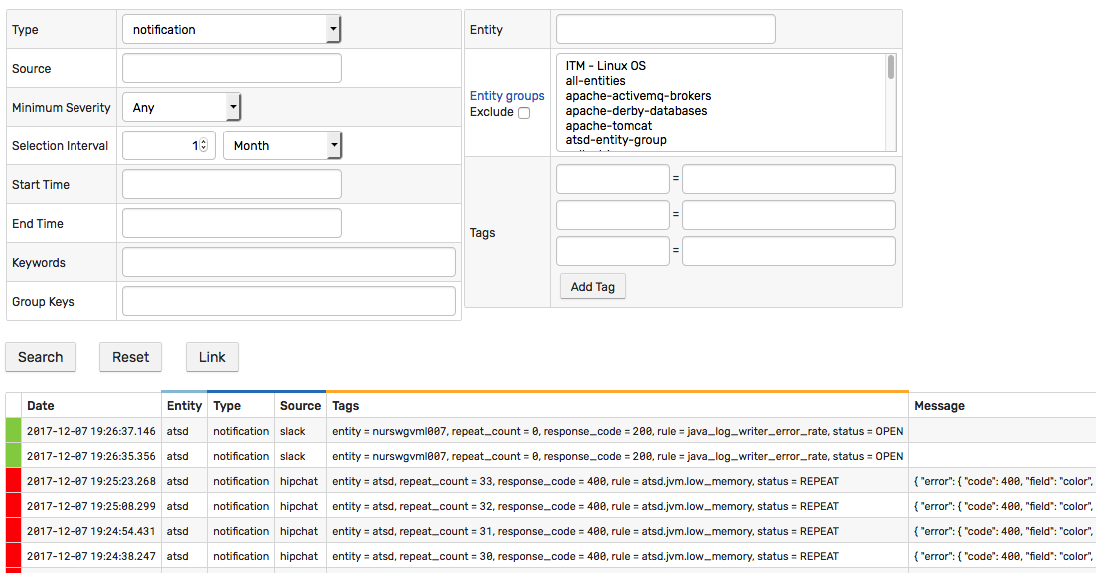
Webhook Logs
Webhook request results are recorded in the database as messages and can be viewed under the notification type on the Message Search page.
/messages?search=1&search=&type=notification&interval.intervalCount=1&interval.intervalUnit=WEEK
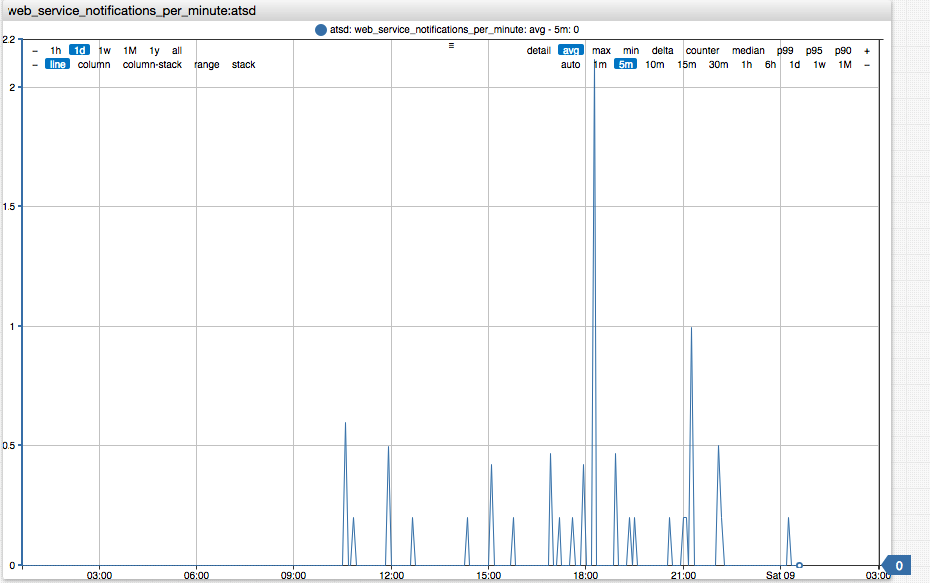
Monitoring
The number of notifications sent per minute can be monitored with the web_service_notifications_per_minute metric collected by the database.
/portals/series?entity=atsd&metric=web_service_notifications_per_minute
Error Handling
The webhook request executes successfully if the endpoint returns HTTP 2xx status code.
No retry is attempted in case of error. If the webhook request fails, the rule engine writes an ERROR event in the atsd.log and stores a corresponding messages with CRITICAL severity in the database.
If the error occurs during chart preparation, the rule engine falls back to sending a text message containing the chart link and the error details, if available.
Network Settings
If the ATSD server cannot connect to the remote API server due to network restrictions, use one of the following configuration options displayed in the Network Settings section.
API Gateway
In this configuration, an API gateway such as an NGINX Reverse Proxy accepts the request from ATSD on the specified path, sends the request to the remote API server, fetches the response, and sends it back to ATSD. This proxy maps particular paths to remote servers.
NGINX configuration for Slack:
location /api/chat.postMessage {
     proxy_pass https://slack.com/api/chat.postMessage;
}
location /api/files.upload {
     proxy_pass https://slack.com/api/files.upload;
}
NGINX configuration for Telegram:
location /bot {
    proxy_pass https://api.telegram.org/bot;
}
NGINX configuration for Discord:
location /api/webhooks {
    proxy_pass https://discordapp.com/api/webhooks;
}
Modify the Base URL by replacing it with the corresponding API gateway URL.

HTTP/HTTPS/SOCKS Proxy
A network proxy of this type does not explicitly map receive paths and remote URLs.
Keep the Base URL` as originally specified and instead fill out the Proxy URL and optional client credentials fields.
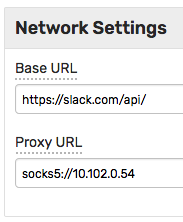
Supported protocols are HTTP/HTTPS and SOCKS v5.
Examples:
http://192.0.2.80/proxyhttps://192.0.2.80/proxysocks5://192.0.2.54