
PostgreSQL
Overview
This document describes how to collect statistical metrics introduced in PostgreSQL 9.1+ for long-term retention and monitoring in Axibase Time Series Database.
The process involves enabling a JDBC job in Axibase Collector to poll statistics views in the PostgreSQL database and uploading the counters and properties into ATSD for processing.
Requirements
- PostgreSQL
9.1+
Installation Steps
Create a readonly user for Axibase Collector
- Create a user:
adduser readonly
- Log in as a
postgresuser and open thepsqlconsole:
sudo su postgres
psql
- Run these commands in the
psqlconsole:
CREATE ROLE readonly;
GRANT SELECT ON ALL TABLES IN SCHEMA public TO readonly;
ALTER USER readonly WITH PASSWORD 'readonly';
ALTER USER readonly VALID UNTIL 'infinity';
ALTER ROLE readonly login;
- Open the file
/etc/postgresql/${POSTGRES_VERSION}/main/pg_hba.conf. - Add the following record to allow remote access from the Axibase Collector server using its IP address:
host all readonly 192.0.2.1 trust
- Open the file
/etc/postgresql/${POSTGRES_VERSION}/main/postgresql.conf. - Enable the database to accept remote connections by specifying the external IP address:
listen_addresses = 'localhost,192.0.2.1' # what IP address(es) to listen on;
Import PostgreSQL Job into Axibase Collector
- On Jobs page, select Import from the split-button below the table and upload the
postgres-jobs.xmlfile.
Configure PostgreSQL Database Connection
- Open the Data Sources > Databases page and select the
postgresqldatabase. - Provide connection parameters to the target PostgreSQL database displayed below:
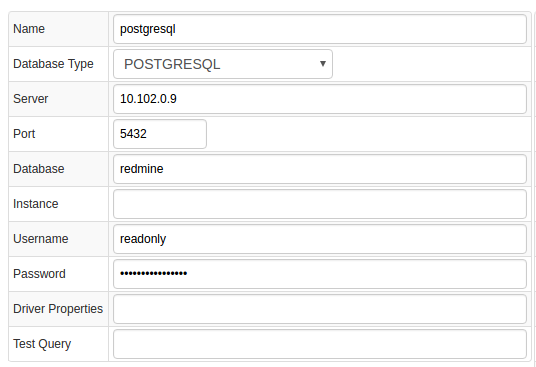
- Execute test query to check the connection:
SELECT 1
- Query result must be
Query OK.
Verify Job Configuration
- Open the PostgreSQL job.
- Set Data Source to
postgresql.
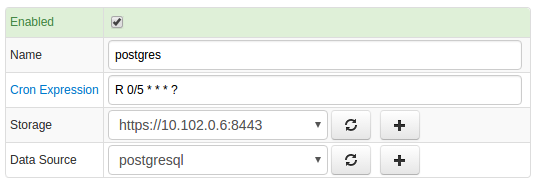
- Choose one of the target ATSD instances if your Collector instance is connected to multiple ATSD servers.
- Save the Job.
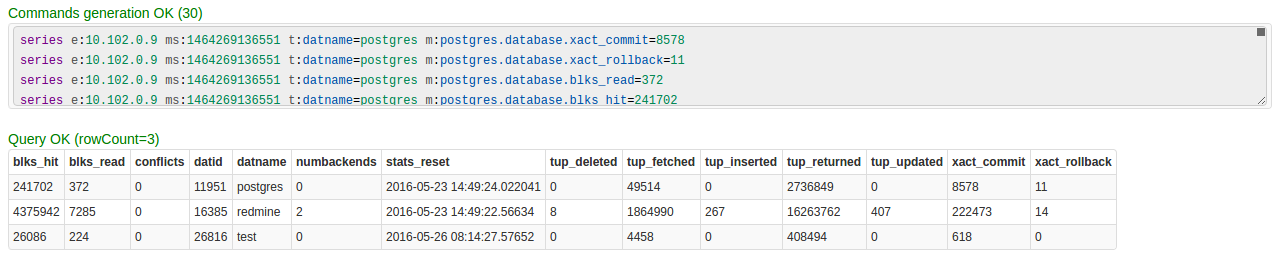
- Open each configuration, click Test, and review the output. See Data Queries.
Schedule the Job
- Open the JDBC Job page and click Run for the PostgreSQL JDBC job.
- Ensure that the job status is
COMPLETEDand Items Read and Sent commands are greater than 0.

- If there are no errors, set the job status to Enabled and save.
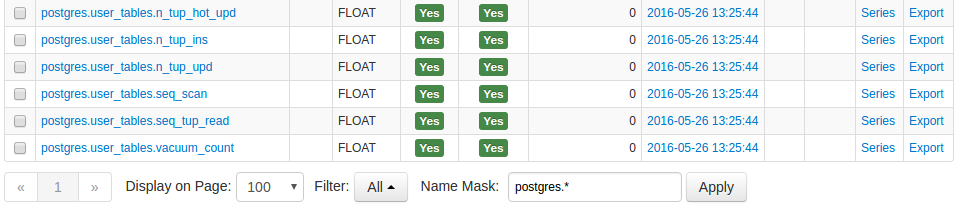
Verify Metrics in ATSD
- Log in to ATSD.
- Open the Metrics tab and filter metrics by name
postgres.*.
Viewing Data in ATSD
Metrics
- List of collected PostgreSQL metrics
Properties
- List of collected PostgreSQL properties
Entity Groups
- Open Settings > Entity Groups.
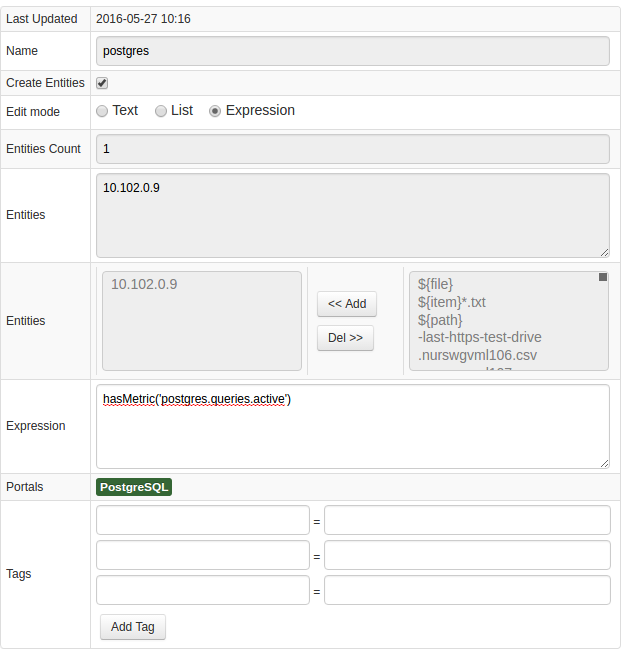
- Create a new Entity Group with the split-button at the bottom of the page, open the Expression tab under Members, and enter the following expression:
hasMetric('postgres.global_status.uptime')
- Save and verify that the group contains PostgreSQL database hosts:
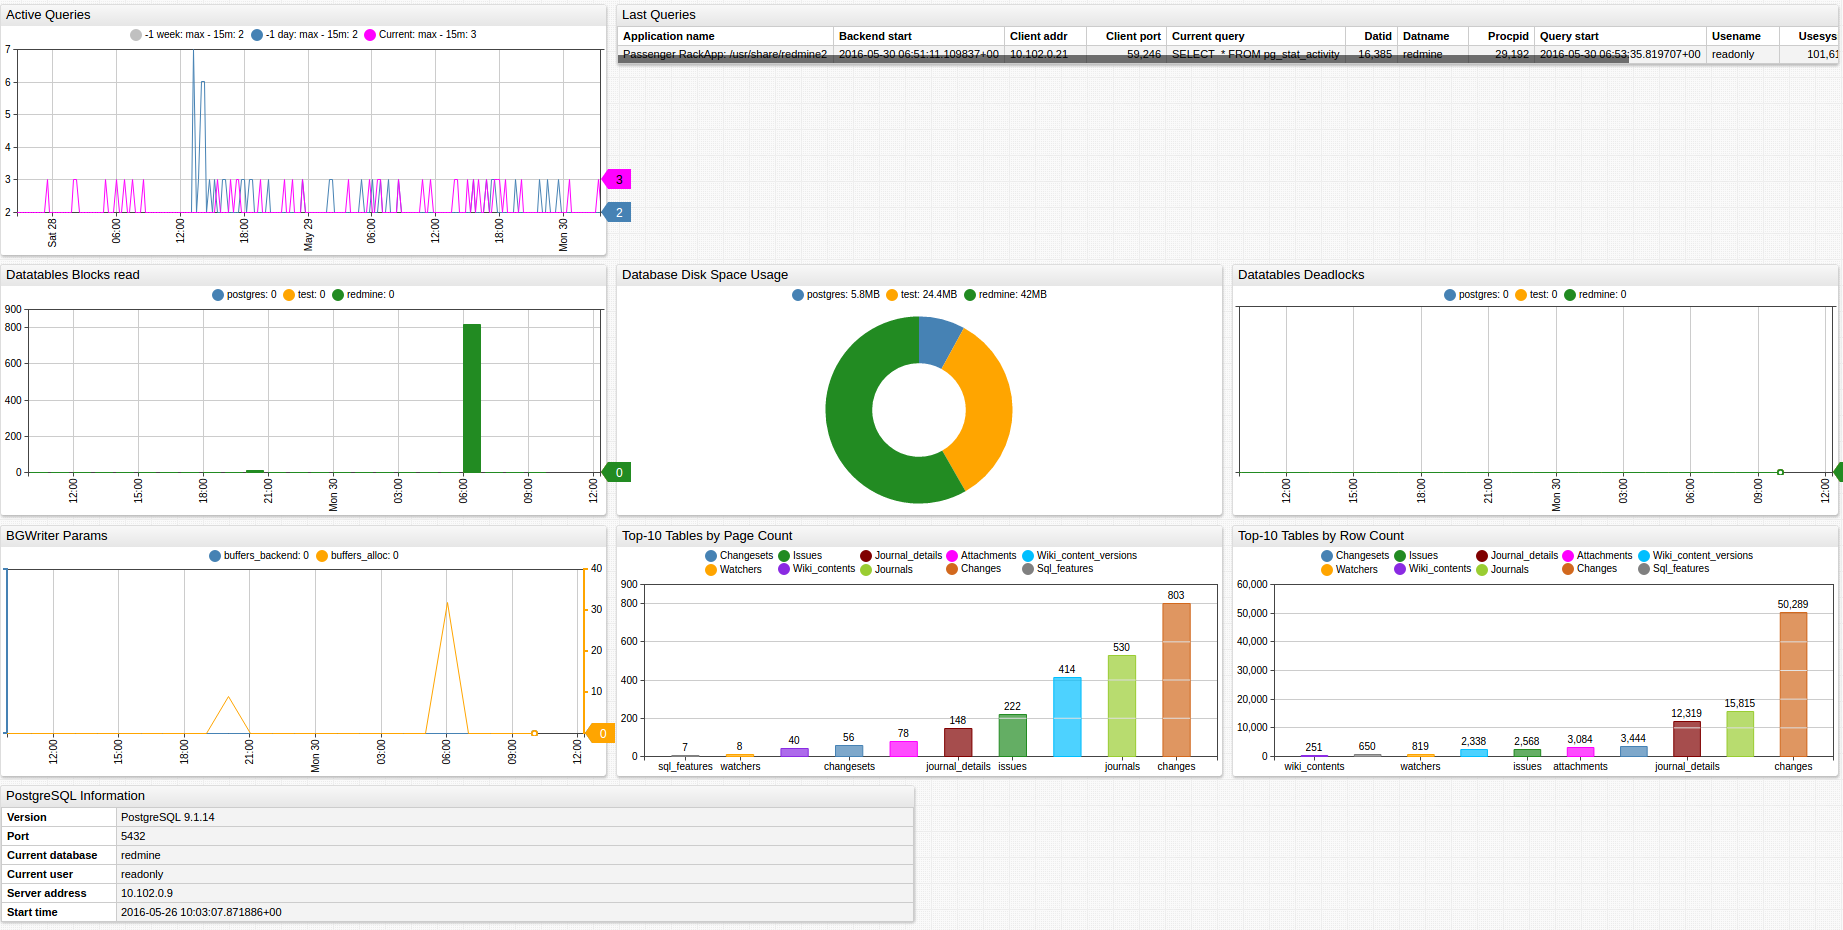
Portals
- Open the Portals menu and select Configure. Import a
postgresqlportal fromportal-postgres.xml. - Click the Assign link and associate the portal with the entity group you created earlier.
- Open Entities tabs, find the
postgresqldatabase by name, and click the Portal icon.

Data Queries
Metrics Queries select most recent statistics as described in the Data Queries Documentation.